Archive
Keg Carbonator Gizmo
I’ve have had little consistency with my attempts to carbonate my kegged beer recently. Looking in to how I might up my game, I came across the Blichmann Engineering keg carbonating system they named QuickCarb™. It looked like a pretty cool system and it occurred to me that I could build my own with parts I already had laying around and honestly, you’re likely better off purchasing the Blichmann product than fooling around making your own. It’s just that I had already purchased the SS Brewtech inline aeration kit for my fermentor and I wasn’t using it. I use a more primitive system comprised of a stone attached to the end of a stainless steel racking can and it works just fine. I realized that with “just a few more parts” I could build a carbonator thingy and pay homage to Blichmann’s genious.

After purchasing a few additional 1.5″ Tri-Clover with 1/4″ barb fittings, I hooked everything up for a test. CO2 is delivered to the stainless steel aeration stone and its flow can be controlled using the provided valve (blue handle above). I used a tiny of amount of CO2 pressure in the keg to push beer into the pump for priming. Once primed, I plugged the pump in and released the pressure in the keg. This allowed the pump to suck beer out, through the carb stone and returning via the gas in (grey connector) at the keg.

Here is a look at the carbonated beer being returned to keg. The system is allowed to cycle for around 40 minutes.

So what are my observations and conclusions about this experiment?
Issues
- Priming the pump
- adding a little pressure to keg allowed me to easily prime the little pump but disconnecting the gas in and reconnecting the beer return made pressure in the line back flush beer.
- I should be able to pressurize, disconnect, then reconnect the return but it seemed like when I did that everything got sucked back and the pump lost prime.
- Haven’t attempted a way to hold or mount this system yet.
- I was considering splitting a piece of PVC pipe to use as a mount for the Tri-Cover tee components.
- I suppose the principle is that once the pressure in your keg reaches your pressure set point on the regulator, the beer won’t continue to carbonate even as it continues to cycle.
- my conclusion after realizing that the return beer looked clear (IOW no longer carbonating) after pressure in the keg built up.
- releasing pressure in the keg caused the beer to look cloudy (IOW carbonating again)
- does this mean the beer has reached equilibrium with the desired pressure?
Conclusions
- Even my first feeble attempt was successful
- I plan to improve on the process
- This project was beneficial to me because I had already purchased expensive parts that weren’t being used
- Blichmann Engineering rocks. Buy their products!
Glycol Chiller Build
One can certainly brew beer without an electrical chiller but in Florida during the summer, it is hard to even keep ale fermentation sufficiently chilled. My SS Brewtech Chronical BME fermentor is instrumented for cooling (has a coil inside) and I had been using cold water as a coolant. My technique was to freeze a couple water-filled milk jugs placing one in the ice bath in the morning and swapping for a fresh one in the evening. Depending on the time of year, this cooling method was problematic and not very reliable. It helped keep the heat of fermentation down during the explosive primary stages but was otherwise lacking.
I have decided, it is time to build my own glycol chiller. I found several good examples of chiller builds out there and begin to formulate my own project. For materials, I used many parts, I already had on hand my shop. The foot print of the unit is rather large primarily because I used the metal dolly from the Harbor Freight Dust collector that was no longer needed but saved for just such a project.

I began but bolting plywood sides to the base, then gluing and screwing the sides at the corners. On one of the narrow ends, I made cut outs for hot exhaust air which will be generated by the portable air conditioning unit and cut slots in the adjacent long sides to allow cool ambient air flow into the box.

Also on hand in my shop was an old Igloo cooler which made the perfect sacrificial vessel for the glycol coolant. It perfectly fit (well not exactly) the foot print and was so old, I had no regrets that I would be permanently modifying it!
Once the box was completed, I began sorting out placement and fitting of the components. The portal air conditioner had to be removed from its case and the thermostat was removed. I was careful to purchase a basic unit which used very basic mechanical switches. You don’t want one which employs a micro controller. In my example, bypassing the thermostat and switch (hot wiring) was simple and very straightforward. When finished, the a/c would turn on full blast when power was applied.

A cut out in the cooler had to be made to accept the condenser and the trade off was bending the copper supply more or making the cut out deeper. I chose to make the cut out deeper while understanding this would also limit the amount of coolant the cooler would accept without leaking. In my case a small portion of the condenser is above the glycol level, obviously it would be more efficient if the entire coil was immersed. I’m just happy I didn’t kink or break the copper supply!
So taking another look at component placement it turned out that my perfectly fitting cooler was actually a smidgen too wide. It didn’t fit the box once constructed. After a good amount of shaving on both sides, I was able to fit the (still not leaking) cooler.

I was planning the build as I built it. I really wanted intake air to not mix with hot exhaust air inside the box. I came up with this simple shroud. I wanted it to be removable but I was more concerned that it would shift and come in to contact with the a/c fan. To this end, I tacked it in place with screws.

In order to power the unit, I decided on two outlet strips, one inside and one outside the box. The inside strip would provide power to the a/c unit and also an LED light strip. The inner power strip is controlled by the Inkbird ITC-308 temperature controller which is mounted on the outside of the box. This makes it easy to set the Inkbird and watch the chiller cycling. The outer strip is also where I plug in the glycol circulation pump. In this way, the fermentor can be cooled independently of the a/c cycling which keeps the glycol cold. Lastly, I can also plug the fermentor temperature controller into this always on outside strip.

For a simple project, there were a surprising number of small details to consider. I was close but I first had to run the coolant lines from the Igloo cooler through the box to the fermentor. I didn’t want to over engineer it but I wanted the lines to be accessible and serviceable. Running the lines from the cooler, I kept it pretty simple. Two holes, the diameter of the tubing and I was through. I did try to consider how the coolant would circulate inside and what the best placement for intake and exhaust would be around the condenser. I didn’t over think it but I ran the exhaust to one side and kept the submersible pump on the other.

I also realized that if I came straight through the plywood lid, I wouldn’t be able to it. Looking through my spare parts I had just enough brass hose nipples and threads to formulate two bulkheads in the box side. The 3/4″ plywood was too thick to go straight through the wall so I used a thinner plywood to make a mounting plate.


To “turn it up a notch” I installed an RGB LED light strip inside. And another last minute detail, my brewery name in morse.

Other than being rather large, I am completely satisfied with this build and have tested it with several brews. My current procedure is to bring wort down from 212°F to around 100°F in the boil kettle using an immersion chiller. This happens quickly using plain ground water. I can then pump the warm wort to my fermentor and let the glycol chiller do the rest of the cooling while I clean up. Before long the temp is perfectly stabilized for pitching and aeration!
Oxygen Free Kegging
As noted in my “About” page and in the title of this blog, I am a brewer. I really enjoy brewing and I love periodically upgrading the capabilities of my brewing system. In 2019, my wife bought me an SS Brewtech 14 gallon conical fermenter brew master’s edition. Suffice it to say that I love it and I’m especially thank-you to have eliminated glass carboys from my life. Glass is dangerous, life threatening even and long before the conical, I had begun the switch to plastic (PET) carboys for safety.

After the initial purchase of the fermenter, I have added a few gizmos to improve my brewing process including the bits I needed for the oxygen free transfer of finished beer to kegs.
Here is an outline of the process.
- Completely fill (eliminate all airspace) a clean corny keg with sanitizer solution.
- Push the sanitizer solution out to a second clean corny keg using CO2.
- Repeat the process on the second keg, this time pushing the sanitizer to a clean bucket.
- Push the finished beer out of the fermenter using CO2, in to the O2 free kegs.
- Don’t forget to open the vent tab to allow the CO2 to escape as the keg fills.
- When beer begins to spray all over your brewery, the first keg is full.
- Repeat with keg two.
That is the essence of it. One simply needs enough proper fittings to make it all happen.
Specialty Items
- “Jumper” transfer tube. Beer out (Black) to Beer out (Black) quick disconnects.
- Triclover fittings (one large, one small) to transfer CO2 gas to the top of the fermenter.
- Small triclover with barb connector for beer out.
- Sight glass for beer out (optional)
- I happen to have a dual port regulator which allowed me to have one with corny and one with a triclover fitting.


Wooden Beer Totes – Build Phase Part 5 – Putting it all Together
Although I have begun to learn patience, I can’t be the only one who gets to a point in their project where they really begin to wish it was all over. Well that was how I was beginning to feel as the deadline for my gift making was rapidly approaching. Alas “The End is Near”.
Beer Labels
About a month ago I asked my daughter Callie if she would be interested in making a drawing for me that I could use on my bottle labels. All of my girls are quite talented at this sort of thing and it was really just a matter of seeing if Callie would be interested. Luckily she was interested and accepted my request. A month later and after she finished her college finals, this is what she came up with for me.

Using the image I worked up a label in Photoshop.

Then added wings to complete the label.

Now all I needed to do was to whip up a neck label and I’ll be mostly there. I started with the Turtlecove logo I had already created for the totes. I added the light green crayon background that Callie used on Santa and added matching holly sprigs to the wings. As an almost invisible final touch, I put a Santa hat on my turtle. Can’t really see it but I know it’s there.

Originally I was going to print these on paper and use milk glue to affix them however for expediency I decided to print them on full-sheet label material and cut them out with scissors. Here is the final product which I saved as a pdf for portability and later printing.

Putting it all Together (finally!)
My final preparation was to lightly sand the totes with a Scotch Brite pad and some soapy water. After drying I them, I followed up with a coat of Johnson’s Paste Wax. The finish was not furniture grade but for tote, I think it suffices. After a couple of hours of quality time cutting out the labels (thank-you Susan!), I was ready to finish my gifts for 2014.

And putting it all together, the big “reveal”


What Happened to the Openers?
I never got around to making the bottle openers which I had hoped to incorporate into the design. I was planning to add a small wooden pocket (tray) on the non-logo end of the tote where I would insert the bottom (handle) of the opener. The top would be held in place by the little magnet I that I was going to inset in the opener “business end”. The magnet would then serve two purposes, its function would serve to hold the loose cap after opening with its other function to hold the opener in position on the tote. For this to work I was going to inset a steel washer into the tote at the proper height. This idea wasn’t the only way to get it done, just one I happened to think might work and was fairly easy to have implemented. But then, I also wanted inlay on the openers….. Sounds like a lot of experimentation and yet another challenge for the Turtlecovebrewer workshop….
God bless you all and happy holidays from the Turtlecovebrewer and Family
Wooden Beer Totes – Build Phase Part 3
One of the first lessons I learned from building projects in the shop was patience. If “Rome wasn’t built-in a day” than neither shall most of your significant projects. But the lesson once learned is to be repeated in degrees and many times one reaches a point in the build where they are just tired of working on it. You feel like shouting “Enough already, let me just finish this!” I caution you and remind myself that short-cuts taken now will show up in your finished work BUT…. as a matter of practicality and perhaps deadlines we all have to make decisions along the way of when to call it “good”. “Perfect is the enemy of good.” I am very excited about this particular project, designing my own beer tote with a new Turtlecove logo, brewing my own special beer to go with them it has been fun and rewarding. It has also been a tremendous amount of work and now that I’m close, I need to retain focus. Eye on the prize my friends.
Meanwhile back at Turtlecove
So Saturday, Susan and I made a quick trip to Melrose primarily so that I could bottle the beer. I wound up with 9 gallons of Extra Stout which has been sitting on medium toast oak chips and fresh hops for about a month now. Bottling day requires about 3 hours of effort with tasks including preparing bottles (about 50 bottles per 5 gals), measuring and sanitizing the priming sugar and capping. Kegging on the other hand can be accomplished in as little as 30 minutes. One vessel versus 50 makes a huge difference plus there is no priming sugar to fool with, as the beer is force carbonated using bottled CO2. I bottled half the batch and kegged the other half (Santa’s gift to himself). It was a long day of traveling to and from and work in the brewery but Susan and I got it done finally arriving home around 8 PM.
Staining and Poly
I had earlier stained the pieces parts by rubbing on Minwax natural stain with just a bit of golden pecan stain blended into it. Why those colors, because I had them on hand? I was planning to use the pecan only but there was hardly any left, so I grabbed what was on the shelf, natural which appears brown to me, and mixed in the bit of pecan that I had remaining.
After (hopefully) taping off all the areas that will get glue upon assembly I applied a rather awful gooey thick coat of semi-gloss polyurethane and let them dry for a couple of days.

Why didn’t I thin the poly before applying? Pure and simple laziness coupled with a just get it done attitude. And what did I get for my efforts? Numerous thick gobs, runs and orange peeling. Which, I knew would be the case when I applied it. I was simply too lazy to go upstairs and look for a jar to mix up the finish and this resulted in me spending hours of “quality time” yesterday leveling the surface for the next coat.
I did come up with a decent idea though, at least for the work I was doing.

Had I properly applied the previous coat, I could have gotten away with some light hand sanding but such was not the case. I found the random orbital sander was going to be extremely helpful considering how many pieces needed correcting. Holding that beast and getting my hands shaken for several hours was not working well for me so I decided to try mounting it which was infinitely more tolerable. I had turned down the speed on the advice of better control but I found that I actually needed more horsepower in this case so I turned it up just a bit from 1 to 3 which made the work a little quicker.

I also took the time to make some “painters points” by taking my homemade square bench cookies and counter sinking three 1″ 5/8″ drywall screws in the pattern of a triangle. They were pretty pointy so I did take the time to dull the tips on the bench grinder before using them on my tote bottoms. This time there won’t be any newspaper stuck to them. Sorry no pictures of the paint points but they are nothing special. Above are my bottoms, suspended on them while drying.
After level sanding the parts looked, well scuffed. This time I diluted the poly 50:50 with mineral spirits and wiped on the finish. The wood figure sprang back to life, much better.

While applying the homemade wipe on poly I figured I’d try some french-polish techniques for fun. I varied my stroke and used figure eight patterns with light landings and take-offs. I realize this isn’t french-polish but I didn’t think it would hurt to practice the technique and I think it did a great job applying this wipe on.
Fatigue has set in
But I’m getting close to the finish line now. The beer is ready and the totes are very near ready for final assembly. There will be one final surprise if I can get my daughter focused long enough. I’m ready to “Git ‘R Done”.
You have been peeping into Santa’s workshop with the Turtlecovebrewer
Turtlecove Brewing – Tour Part 1
Man this is one busy time of the year. Between work and the holidays I haven’t had much time to noodle in my shop. Last week Susan and I hosted Thanksgiving at our home in Melrose, Florida (aka Turtlecove) and having a couple of extra days there, I decided it appropriate to make Saturday a brew day. I hadn’t planned on brewing so we also made a quick trip in to Gainesville on Friday to purchase brewer’s yeast at my local homebrew store (LHS) Hoggetowne Ale Works. Like a kid in a candy store I purchased a “few” other items to the tune of about $130!
Since I didn’t have any time in my shop this week, I figured I could write briefly about how I brew at Turtlecove. Home brewing has some similarities to woodworking in that although the science and techniques are universal, the tools and processes individuals use vary widely. I would venture to say that no two brewers’ gear looks exactly the same because the majority of these systems are homemade. I love the quote I found by fellow homebrewers at “TexanBrew“, I think it describes homebrewing in a nutshell.
Brewing beer is neither complicated nor expensive. It’s the responsibility of the brewer to make it as complicated and expensive as their wives will allow. Great beer is made in small pots in a kitchen; our beer is made in larger pots in the garage. People have been brewing spectacular beers for thousands of years; we’ve been brewing mediocre beers for a few months. Since we’ve been brewing for months, we’re naturally experts.I can add nothing to better describe the craft or the mentality of the brewer.
The Process in Outline Form
- Malted grain is cracked (basically rolled) using a grain mill
- Water is heated to a temperature such that when the malted grain is added it steeps at the predetermined mash temperature usually in the range or 150-158° F. I commonly mash at 152° F.
- Enzymes in the malt slice up starch molecules in the grain producing different types of sugars. It is this sugar that the brewer’s yeast will ultimately consume.
- The mash liquid containing these sugars is called wort and it is run into the boil kettle for the next process, “The Boil”.
- In order to get all the sugary goodness from the mash, more hot water is added to rinse the grains. The rinse water is also collected to bring the volume of liquid wort in the boil kettle to the desired pre-boil level.
- Boil times are typically 60-90 minutes during which a variety of hops are added at predetermined intervals. Boiling the wort serves many complex purposes and the addition of hops at different times during the boil and of different varieties also serves complex purposes.
- The boil has to now be cooled to a predetermined temperature so that the brewer’s yeast can be introduced to their new home. This is typically between 45-72° F depending on the yeast used and the style of beer.
- Yeast are added and the Good Lord does the rest of the work to actually make beer
- After fermentation beer adjuncts are often added to the beer to add distinct flavors. Common adjuncts include oak, fruits, peppers, spices and in the case of homebrewers almost always fresh hop cones are added.
- The final step is to bottle or keg your beer and to carbonate and chill to serving temperature
Like making furniture, brewing is not for the faint of heart. We brewers find that once our brew day runs smoothly we often add an additional piece of equipment or additional step in the process to further complicate matters. If things DON’T run smoothly, we do the same thing.
Some of the Turtlecove brew gear
“The Beer Bitch”
This is the nickname my friend gave my brewing system before I was married with step-kids. My wife doesn’t appreciate the moniker and my children think it “swearing”.

A three tier stand welded from angled steel. Each level contains a propane burner. On top the uppermost burner sits the kettle for making hot water called the hot liquor tank or HLT. In the middle is the kettle for mashing generally called the “mash tun”. The mash tun has a filter at the bottom so the wort can be separated from the grain and run into the lowest kettle. The lowest kettle is the boil kettle and I have instrumented it with the most capable burner because it takes a lot of heat to boil 15 gals of liquid for 90 minutes. In this photo the top two levels are shown. Brewing occurs on the back porch which provides me a view of Turtlecove and the back yard.
Moving Brews
Three tiered brew systems are designed to allow gravity to move liquids between kettles. From the hot liquor tank through the mash, boil and finally into the carboy used for fermentation, the liquid can be drained downhill. That works and I made a lot of beer using this method until my beautiful wife bought me a pump for Valentine’s Day. Pumps add new capabilities, allowing liquid to be moved between kettles and even uphill if necessary. Brewers often purchase two pumps and they often mount them to their brew stand. I saw an article in “Brew Your Own” where a fella housed his pump in a tool box and I immediately loved the idea. My pump is portable, it can be placed where it is needed and can be stored inside out of the weather.


You can certainly get creative with this, I happen to have this toolbox at the house so I decided to go with it. This box even has a little room to store items that could come in handy on brew day e.g. hose clamps, spare o-rings, GFI adapter, etc.
Hoses
Now that I was pumping boiling liquids around I decided to upgrade to high temperature tubing and polysulfone quick disconnects (QDs). My method for connection was to place male QDs on all of the hard points and to make up hoses with female QDs on both ends. Thus I can connect any thing to any other thing using any of the 4 identical interconnect hoses.

Here’s a closeup of the male QD on the pump outlet. Notice the nifty bleeder screw on this ball valve. One of the problems with pumps is that they must be primed with liquid and this is another reason why a movable pump is a good idea. I can lower the pump below kettle level and open the bleeder to let off air in the line. When I get a steady flow of liquid from the bleeder, I can close it, open the ball valve lever and turn on the pump! This sounds elementary but believe me, many brewers including myself have been very frustrated with pumps that didn’t!
The Lab
I set up my utility room for the dual purpose of laundry and an indoor work-space. When I had the house built I wasn’t even a brewer but I liked the idea of an air-conditioned space where I could work inside so I rearranged things to line up my washing machine on side and a narrow counter along the opposite wall. I also had a laundry sink installed. This now houses my brewing equipment, provides a counter on bottling day and a wet sink for cleaning equipment and glassware.
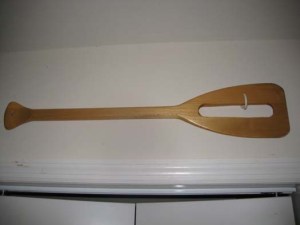
Inexpensive mash paddle made from a small canoe paddle. As a fledgling woodworking I think I could now do better 🙂

Scales for weighing heavy stuff like grain (right) and light stuff like hops or bottling sugars (left). Rear left is my stir plate which is sort of homemade “commercially”. Stir plates are traditionally used to grow up yeast starters for brew day.

A bottle tree holds you bottles after you washed and sanitized them on bottling day.

Misc glassware. The flask can be used on the stir plate but in reality I make large starters in the big brown jug and it doesn’t work on the stir-plate.

The shelf above the laundry sink holds copper coils which are used for cooling the boiling wort to a temperature low enough to “pitch” (add) your yeast. The coils on the right are immersed in the beer and cooling water is run through the coil. The device on the left is referred to as a convoluted counter flow chiller which is actually two coils in one. Cooling water is run though the outer coil and the hot wort is run through the inner coils in the opposite direction (thus counter-flow). It is this counter-flow the allows the difference in temperature (delta T) to remain as high possible and thus it is a very efficient device for cooling. My wife also bought me this awesome gizmo. Again I point out the male QDs on all the “hard points” allowing all this to be quickly plumbed together.

This is a neat contraption. The copper ring is set upon the top of the grain bed and hot water can be let in such that it “sprinkles” through the grain bed. The thermometer lets me know the temp of the liquid being added and is removable so it can be used in several phases of brewing. Although not my idea, I made this version of the “through-mometer” myself from parts.
I’ve run out of time for this post but I will continue my tour of Turtlecove Brewing in my next post.
You have been reading an excerpt from the shop journal of the Turtlecovebrewer.
