Archive
Shaker Step Stool – Part 3
So this is how I’m beginning to feel about now:
I realized that I was going to have to work evenings if I was going to finish this project before Christmas. My beautiful and caring wife reminds me that this is a “totally artificial deadline”. When you think about it most deadlines are artificial or at least the vast majority of them. Perhaps the better way to phrase it is that my “goal” would be to have the Christmas gifts finished and at least shipped before Christmas. If transportation delivers them after the actual day, I’m perfectly OK with that.
Sunday’s Goal – Fit the legs
Because I didn’t work on the project Saturday, I found myself unable to complete all the leg tenons on Sunday. In fact part of the problem was that I was a little intimidated cutting and fitting my first “real” tenons. And I wasn’t starting with the simplest possible tenon either. These were double tenons and they had to fit. Never-mind I was cutting in pricey sapele and that these are gifts. No pressure right?
Rather than loading a dado stack (my original plan) I decided to go simple and use my regular combo blade and cross cut sled to cut the tenon face cheeks. For whatever reason I was just certain that I wouldn’t be able to properly locate and center the tenon cut.
Prior to cutting anything on my table saw, I had to stop and figure out how to tighten the belt between the motor and the blade. The loose blade had been nagging me for a while and now the blade wouldn’t turn at all. It turned out to be a simple very simple fix but never having done it, I first referenced the user’s manual. Opening the saw also made it very clear that I wasn’t going to saw anything until I emptied the saw dust. All this delayed the inevitable, cutting and fitting my first tenon.
Using calipers, I measured both the leg thickness and the width of the actual mortise. The tenon thickness was just shy of 1/2″ as measure with my calipers and the depth of each face check would need to slight less than 1/8″. I subtracted the actual measurements and divided that number in half to give me the cheek depth. I did my best to set my table saw blade to that that height which was difficult because it was less than 1/8″ and I don’t really have an actual gauge for this purpose. I couldn’t use my pine prototype because it wasn’t the same thickness as my actual project pieces but I had cut the stretchers over-sized so I used them. It only took me three adjustments to dial in the depth of cut I wanted. I was close on the first pass but it left the piece just a tad too thick and I’ve have to pare to fit them. I noted the hand wheel position before adjusting and raised the blade by less than a quarter turn of the wheel. This made the tenon loose, I didn’t want that. Splitting the difference I found what I considered a satisfactory fit. Wow, that wasn’t so bad. Using the “speed tenon” technique as discussed on Fine Woodworking Magazine, I cut both sides of both legs easily. I should make note that at first I moved the piece through the blade in multiple passes (forward and back, shift, repeat). This was of course very safe but it did leave ridges on the tenon. I don’t (yet) have a shoulder plane so I flattened the cheek by paring with a chisel which worked just fine but it took longer and was less accurate than a plane would have been. Later on in the process, as my confidence grew, I really did use the speed tenon technique (nibbling by moving the piece sideways across the blade) and this greatly improved the surface of the tenon cheek and reduced work required for clean up.
So far so good, on to the side cheeks.
Generally it is recommended that rather than measure, one precisely mark with a knife. My experience has been poor with the whole marking thing, especially on this project. For one thing when I did mark with my knife, I had a VERY hard time finding it again. I literally had to hold the piece directly under a lamp and put on my magnifiers to locate it. Sure I could feel it, but that doesn’t help when you’re trying to extend the line with a straight edge. I found that method a no go and in the end measuring with calipers and marking with a pencil worked well for me. I was simply careful to cut on the waste side of the line. I went low tech and decided to make all these cuts at the band saw. I lined up the first outside edge and set the fence. Initially I was setting and using a stop block to prevent me from cutting into the shoulder but after a while I found it took too long to setup each time and that it was unnecessary. If I paid attention, I wouldn’t cut into the should. I did and it worked fine. After the first outside edge cut I introduced (like that huh?) the kerf to the mortise to confirm I hadn’t screwed up then marked the other outside edge with a pencil. After doing this each time, I came to conclusion that I had done a fair job marking the mortise locations and that I could simple flip the leg over at the band saw and cut the other edge. To my recollection though I did mark each time just to be sure. The outside shoulders were cross cut on the band saw, aligning by eyeball and using my miter gauge. Again being careful I had absolutely no problems cutting in to the work piece shoulder.
Cutting both inside edges was pretty much an identical process with the only difference that I made multiple cuts about 1/16″ apart (the more the better up to a point of course). Think feather board with very narrow feathers. It is important not to get lazy and make the fingers too thick. If they are very thin they can be easily and cleanly chopped away with a single blow from a mallet and sharp chisel. If they are too thick they can be not-so-easily hammered out with mallet and chisel leaving a torn ugly surface that needs more clean up. Don’t ask me how I know this.
It was all being done for the first time so I wasn’t exactly confident but lo and behold it worked!
One down, five more to go. Actually I only finished three before it was time to clean up and take my family to town and diner. It would seem, I’m behind schedule already.
Monday Night’s Goal – Complete Fitting Legs
Not much to report here except that in my haste to “finish” on Sunday I had decided to change-up my method. Instead of cutting all those little fingers I was looking for a quicker was to cut out the center material. Hey, I just purchased that groovy new fret saw that worked so well for me cutting out dove tail tails. I’ll just saw with confidence along the shoulder and botta boom botta bing, done with little paring clean up required. Wrong…. unfortunately. I did a passible job on the visible side all the while cutting in to my project face on the back side. Now it turns out this will be mostly covered by the stretcher but only after I made the command decision to not make that side the face. It was the better side originally, not any more. Which was another wake up call. Note to self: When cutting, chopping or whatever ALWAYS give consideration and preference to the face side. Why didn’t I saw with the face facing me? I didn’t think about it at the time. Seems obvious until you are busy working hard to make stuff happen and it doesn’t occur to you until you’ve made a mistake.
Tuesday Night – Band Concert
No work can be completed my youngest has her very first band concert. She plays the french horn.
Wednesday Night – Fit the Stretchers
Given my experience fitting the legs I was hopeful I would make up time on the stretchers but alas this was not the case. Having said that, it actually went pretty well. I fit the legs to the top and squared up the legs with a small combination square. Some of the stretchers even had the face cheeks cut on one side. They looked fine, so I measured and cut the opposite end to length and added the face cheeks. Pretty much a repeat of procedure at the band saw followed by paring with chisel. It all went well until the very last tenon which stubbornly wouldn’t fit into the prepared mortise. I blame the mortise and after struggling with multiple operations on the tenon side, began paring inside the hole. Of course I ended up getting careless, forgetting the cardinal rule to carefully pare from each side and of course the protective blue tape had been removed. Eventually I got it to fit and ended up with undesirable tear out to boot. Goal was met, I was tired and hungry.
Thursday Night – Taper Legs, Make Wedges, Saw Tenons to Receive Wedges
After a quick bite to eat, I was back in the shop. I began by making a simple tapering jig for the legs. I am such a tightwad and I’m always looking for just the right pieces to make my jigs. It bothers me to use a piece of wood for scrap that I believe could be used for higher purposes. I know, you just have to get over it but to some extent I believe this is only right. Reduce, reuse and recycle right? Fortunately I am drowning in scraps and was able to locate suitable pieces for this purpose.
Making the jig was uneventful and before putting it to use I tested on my pine prototype leg. The pine piece was shorter than my project legs, other than that it was a go.
After all legs were cut on one side the jig had to be adjusted to cut the other side. I used the same jig of course simply moving the right hand fence to the new correct angle which was now doubled. A test cut proved that I had to shift the (right) fence in just a tiny amount or I would be left with a flat on the other leg. I did this and finish this procedure without incident.
Next I was to cut two sizes of wedges that will be used to wedge the tenons of course. I have spent entirely too much time worrying about these dang wedges. First what material? Project calls for hard maple and I have none. Should I cut up my guitar finger board blanks for this purpose? I have maple, zircote and macassar ebony which I could sacrifice. Did you read my last paragraph? Do you think I’m going to cut up an $18 fingerboard blank so I can make some wedges? I decided against this. Off I went to the Internet to see what I could possible use as an alternative to hard maple. I quickly found a post from Chris Schwarz on how to make wedges. Chris likes to use white oak, now you’re talking. But then he goes on to call red oak “a weed”. OK so here’s my admonishment to you Chris. You’re awesome, I appreciate you and I respect you. Unfortunately many people actually worship you and when you say stupid things like that it somehow becomes a tenant of woodworking. It comes off not like a personal preference, ” I prefer to make my furniture from mahogany rather than pine” but more like, “if you make your project from red oak it is somehow inferior”. You were making a joke and I get it just remember people tend to take you way too seriously. Stating an experienced preference is fine, implying that people are wrong but choosing differently is divisive. People need to stop caring about trivia like that and just make things (Making It) . Now I REALLY have spent too much time worrying about stupid wedges!
So I go to make this wedge jig for the band saw and I although I watched the video and took note of it, I couldn’t reproduce it from memory. So I pulled it up again and proceeded to make a jig. I didn’t get it right and the wedges came out thicker than I wanted but I kept going anyway. I was having trouble figuring out how to make the wedges tall enough for the top tenons. This is an instance where experience is that only way I was going to really “get it”. The upshot was that I spent the rest of my evening struggling to cut all the wedges I needed for glue up. I had hoped that I would have been able to actually make the saw kerfs but that will come with the next session. Not a lot of mystery in that process.
Friday Night – Kerfs for Wedging, Beveling the Top, Chamfering Edges, Surface Prep
My original goal was to glue up the stools by Friday night so I would be essentially ready for finish on Saturday and Sunday. I can see now that probably won’t happen. My revised goal is to cut for wedging, and bevel the tops. I can also see me doing some initial surface prep but my concern is that I’ll rush the job.
Stay tuned for the final episode to conclude this weekend…..
Shaker Step Stool – Part 2
As the saying goes, “there’s good news and there’s bad news, which would you like to hear first?” Given the circumstances, I suppose I should pick. Let’s start with the good news, I was able to get a substantial amount of work completed Sunday on this project. The bad news is, I’ll never get them ready by Christmas unless I spend more time in the shop. I’m contemplating working a few nights this week after work. We’ll see how that goes…..
Mortises for Legs
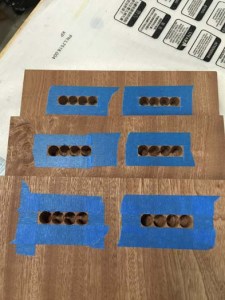
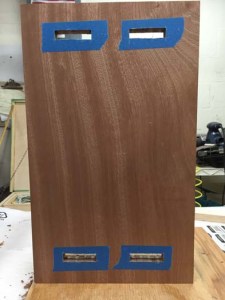
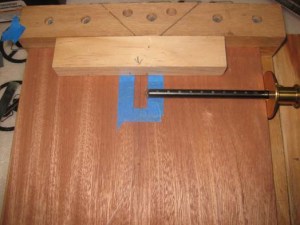
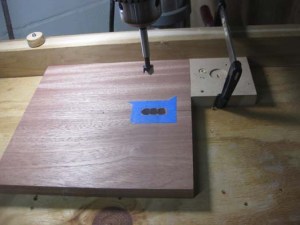
My last post left things where I had marked out the 4 mortises to receive the leg tenons. I used the same blue tape technique to successfully reduce tear out. My drill press was already chucked with the 1/2″ Forstner bit previously used on the leg mortises. Also in a similar manner I used a stop block and fence to locate the exact position for the first hole which would define one edge of the mortise. Here’s where the technique was modified. When previously drilling the leg mortises, I drilled approximately half way through, then I could flip the board and drill through from the back side. I could do this because the mortise was centered and the stop was accurately set. This time I set the drill depth such that the very tip of the Forstner bit would just poke through the back side (top of photo below). I could then flip the board and complete the hole by eye.
I reset the stop block for hole however I was able to drill a hole in each mortise of each board before moving the stop for the next hole. Obviously I rotated and flipped the board and was drilling from both the front and back. I repeated this process until all four hole locations had been drilled on each of the tops.
At this point, I just had to tuck in and get busy chopping the 12 mortises. You will recall that I scribed the wood first, then applied the tape and scribed the tape. The first mark help cut the fibers and the tape greatly helped to both define the line and reduce tear out. Remember the basics. In time this work was completed.
Having 12 to cut was not only good practice but it also was a good lesson in patience.
Tenons for Legs
It is true that I had several household chores I wanted to address and this did consume my Saturday. I ran network cable to my basement and installed and configured router so for the first time I have reliable Internet access in my shop. I also installed a new network printer and messed around with adding Chrome-cast to my shop. Hummm, I also assembled a new habitat for my daughter’s new guinea pigs, Snickers and George. Yes, I needed/wanted to do these things but I was also procrastinating. I haven’t fit many tenons before, if we ignore the stubby ones cut in pine for my mini-bench, these would be my first. They were dual tenons and I wanted them to fit and look smart. I didn’t know how it was going to go but I had to get started.
I began fresh on Sunday morning. Turns out it wasn’t as impossible as I was expecting. I started with the cheeks. Using calipers I confirmed that my mortises were in fact, consistently 1/2″ in width. I then measured the thickness of my stock which was 0.75″. Doing the math (0.75″-0.5″)/2 = 0.125″ for the depth of the shoulders. I employed my cross-cut sled and contemplated loading up my dado stack but ultimately just went with my combo blade and multiple passes. I obviously wanted to make some test cuts and fortunately had left my stretcher stock long so I used the ends for testing. My first cut was pretty close but I thought a tad tight. Taking note of the hand wheel position, I raised the blade slightly and tested again. Definitely a too loose this time. Third test I was satisfied and have left the blade at this height for all subsequent cheek cuts.
At this point, I took time out to cut a gauge that would help my center the legs. As I was fitting dual tenons to mortises, I didn’t want to just eyeball it and I had 6 of them to do. Basically I formed a small scrape the width of the desired overhang and screwed it to another piece of scrape that was used as a fence against the edge of the top. Sort of like setting a combination square only I wanted something with a much longer registration. It was crappy work (the tool) but it served its purpose and was reliable and work continued. Using the gauge, I introduced the leg to the mortises and marked them with a pencil line. One would think that a knife mark would be more accurate and I started off in that vain but truthfully, I not only couldn’t get an accurate knife mark and when I did, I couldn’t easily find it again. The pencil mark was easy to make and easy to see and was accurate enough. I cut all the edge cheeks on my band saw making sure the cut line was in the waste area. The edge shoulders were also cut on the band saw and the center section was perforated as though I was making a feather-board. I then chopped out the fingers and cleaned up the shoulders by chisel. I was shocked that by taking my time I was actually able to get a good-looking fit. I was definitely “concerned” but by the end of the day, I had learned that I could make it happen.
I was able to complete 3 of the 6 legs before I needed to shut down for the day. Leg number 3 fits great but it take a lot longer than the first two. In a hurry to get started on leg number 4, I decided to skip cutting and chopping fingers in the center section and decided that I would use my fret saw to speed the process. It was a mistake to suddenly change methods and be in hurry at the end of day when I was already somewhat fatigued. It resulted in a needless boo-boo but it did but it did give me a definitive stopping point. Time to clean up, shower up and take my family into town for dinner.
Thank-you for visiting Turtlecove Workshop. After finishing up the leg tenons, it will be time to fit the stretchers, bevel the tops, and taper the legs. I’m thinking I might have to do some homework to get this project moving.
Shaker Step Stool – Part 1
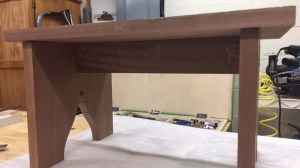
There aren’t many days left until Christmas so I’m in the workshop and getting down to business. This year I decided to make the little Shaker step stool which can be found on startwoodworking.com. Tom McKenna from FWW takes you through the build with a 6-part video series and there is a downloadable PDF with project dimensions. I felt this was a perfect match for Christmas.
Ordering Stock
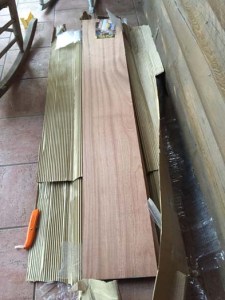
For the first time I’m not using home center lumber. The example build used walnut which I was going to replicate only when I got on the Woodworkers Source website I ended up changing my mind. I was hoping for American walnut but they had a “tropical walnut” on special and I almost bought it. This species was very dark brown, certainly not traditional but not offensive by any stretch. I actually had it in my cart when I ran across the sapele which was even less expensive than the tropical walnut. I decided to order the 20 board feet project pack which arrived on my birthday.
Milling
Another first will be milling and jointing “rough” lumber although I must say, this rough lumber was quite friendly. As it turned out I had two boards with the width I required for making these stools and it ended up working out that I could make three from the materials at hand. Originally I had planned to make 4-6 of these but now that I’ve started the work I’m glad it is only 3. Although touted as a beginner level project, I personally feel it to be intermediate, at least if you are to have the skills to do a decent job of it.
I began but rough cutting all the pieces to 1″ over the final length except where I didn’t have enough board. In this instance I left them as long as I could and was careful.
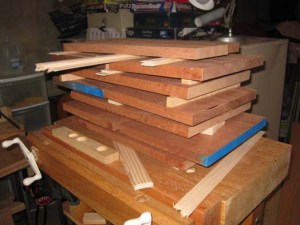
Golden Rule #1 – don’t make cuts to size until you have to. Why prematurely cut you stock when you may find out done the line that you made it too short? Leaving stock oversized give more flexibility should tear out or other unforeseen issue occur.
The rough cut boards were stickered until I could get started on the project which happened to be last weekend.
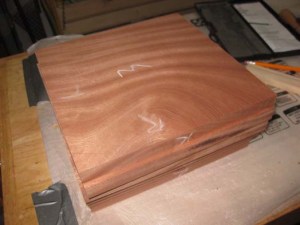
Stock preparation was fairly typical although for me it was another first. I’ve used my jointer/planer before but this time it was the real deal. I jointed two faces and planed the third. I took as little off as necessary and wound up with a thickness of about 0.8″. The fourth face was cut to width on the table. Milling 101 stuff but again my first time completely through the process. I wanted to keep some level of grain match so as I chopped up the boards, I labeled the pieces using chalk. I used “R” to make reference (jointed) faces.
Prototyping
Golden Rule #2 – practice on scrap. I had plenty of select pine around so I started the project by working on a prototype. Why not practice first?
Before I started cutting on the sapele, I built the router template jig for the whale tail and tested on pine. The pdf provided half a full-sized template of the profile and the video showed how to make the jig.
So far so good.
Legs
This weekend I was able to get started in earnest. To say that I am an experienced woodworker would be somewhat comical however, I do feel comforted that I am gaining some experience and finding it useful. I certainly can’t predict all situations but I am beginning put order in the process. For example, with all the measuring I need to do on the legs to find where the hole goes, lay out the whale tail cut, and place the mortise, why would I taper the legs first? In fact tapering the legs will come last so the piece can be registered along the width. Another example, one could choose to drill the hole after making the whale tail but it wouldn’t be difficult to predict that the drill bit would wonder and tear out would be inevitable. I believe it is Chuck Bender that always says you are experienced (or gain experience) when “you can predict how the wood will react when you put a tool to it”. I’m not there yet but I’m starting to use my head more often than in the past.
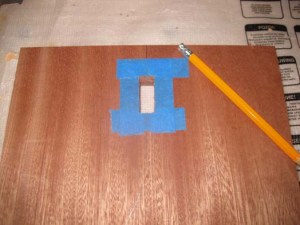
Blue Tape Trick
So I don’t know who actually invented the blue tape trick but I first heard of it as presented by Michael Pekovich Fine Woodworking Magazine.
I also followed another Pekovich (thanks Mike) trick and used a wooden spacer to layout the top of the mortise. My marking gauge scribed the mortise side and a simple carpenters’ square located the bottom line of the mortise. Not having to fiddle with settings allowed me to mark all 6 pieces pretty much identically. I first scribed the wood, then applied tape and repeated the scribing to remove the mortise window.
I set up the fence and a stop block on my drill press to exactly excavate one end of the mortise and set the drill bit depth to penetrate just over half way through the board. I then carefully drilled the first side flipping the board over to complete the hole. I repeated this step for each of the 6 legs, then moved the stop block to the other end of the mortise and repeated the process. A third iteration completed the excavation by taking out the remaining center section.
The couple of hours were spent the old-fashioned way, hand chop with chisel and mallet.
The Whale Tail
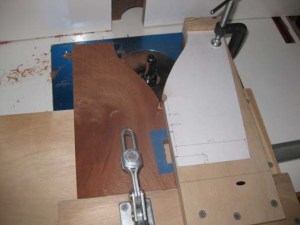
For the next step I decided to move on to making the center decorative cut out on the legs, the Whale Tail. I reprised my process at the drill press, adjusting the fence and stop block to precisely the location marked by punch at the top of the tail. Once again I drilled from both sides to replicate clean holes on all 6 pieces. I was able to use the template and a 1/2″ center punch to mark both the hole and one side of the whale tail profile. Flipping the piece over allowed me to mark both halves of the tail and then over the band saw. I began by making a relief cut right down the center of the tail cut out. I then tried my best to cut out the profile, leaving between an 1/8″ to 1/16″ of material to be routed away. I now know that I should have left about 1/8″ because when I got very close to the line in some areas, the router didn’t want to cut that area. Much cleaner to have the router shave the entire length than to have areas with band saw marks and burning to be cleaned up by hand.
For the most part the router template jig worked perfectly. Because I left my stock a teeny bit oversized (why not, I didn’t need to waste precious wood) I needed to add a template extension to the end of the profile (top right of photo just above the C clamp). It was worth it to add this piece and clean it up nicely because the legs came out great.
It was the very next step that through me into a spiral. The router bit won’t fit all the way up the crotch to the 1/2″ hole so there is about 3/4″ of wood that must be chopped to the profile line with a chisel. At least that is how Tom did it in the video. I found this part was problematic and I ended up with tear out at the end of the leg profile pretty much no matter how I approached it. I recommend a careful study of the grain and very chisels if you are going to attempt it. Personally I was looking for an alternative but soldiered on anyway.
Mortises for Tops
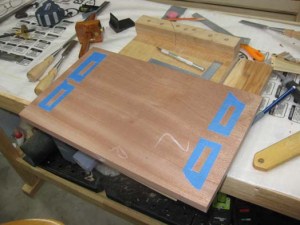
Well after a bit of study over the plans and ciphering on my particular board dimensions, I decided on where my mortises should go on the tops. For this I used two marking gauges and two carpenter squares to layout the mortises on front and back sides of the 3 tops. It took a little while but I wanted to get this part completed and ready for my next shop session.
It’s going to take some time but I’ll be setting up the fence and stop and one by one drilling all the holes required for all 4 mortises. Once set a hole will be drilled on all 3 tops, then reset for hole next, etc. Each setup will allow me to drill (partially) through all 4 mortises (but not all on the same side of the board. In this case, I’ll set the Forstner bit tip to just barely poke through the other side and then will flip the board over and line up the mark to complete the hole. This will need to be repeated of course for each hole of each setup. As I said, it is going to take a little while but should produce accurate and clean results. I’ll just need to keep my concentration……
Join me next time and we’ll chop more mortises and cut some tenons together…..


