Wooden Beer Totes – Build Phase Part 1
“It’s just as easy to build six as it is to build one, right?” “I don’t think so Tim….”
I’m a bit behind on my shop journal entries but this is typical of what happens when I’m actually busy in the shop. Since my last post I’ve had bits of 5 days in the shop and I will continue to work hard until I see the end in sight.
Production Phase – The Long Veteran’s Day Weekend
So I left off at the end of my last post having built Proto Tote #1 in cypress, then up-sized it with Proto Tote #2 in pine. I never finished Proto #2 having run out of stock on hand and also knowing that I would be using the bits as templates there actually was no need to build it other than a dry fit to make sure it was all going to work. In preparation for the build I made my trip to Lowes to pick out the best “select pine” boards I could find. It was then that I found out Lowes does not carry pine in 1/4″ dimensions rather it is 3/8″. I had already decided that I wasn’t going to mill my own thin stock and I didn’t want to mix and match wood species (could have purchased poplar for example) so I went with the 3/8″ pine. The only issue with this thicker stock was that my tote bottom was going to be too narrow for the tote to handle 16 oz bottles with the thicker stock. See I already knew this from building my prototypes but I opted to stick with the 1×6″ stock being both economical and frugal with the World’s wood resource. I’ll show you what I came up with later.
The following weekend I had five days off in row and although I wasn’t in the shop the entire time, I did get significant work completed on the production run. I was happy with Proto #2 true enough, but it wasn’t perfect so assuming I was going to use it to build multiple copies, I was hoping to finesse the design. I somewhat simplified the hard edges of the sides top (what would be the bottles lid) and widened the radius so that I could fit my smallest sanding spindle in there. After all it just makes good sense to fit your design to your tools if you can. I also decided to use a 1/2″ round over on the face edges but not the inside edges, those would be relieved by sanding.
It is definitely NOT as easy to make six as it is to make one BUT there are economies of scale such as setting up the jig and/or bit once and cutting many and I did find that after trying two or three I usually came up with what I would call the best method. So in that way practice made better. Everything component but the bottom and the handle came in quantities of two or more so I found myself needing to maintain my concentration on the twelfth cut or the twenty-fourth route, etc. That too was good practice.
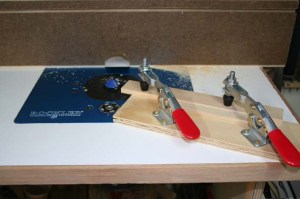
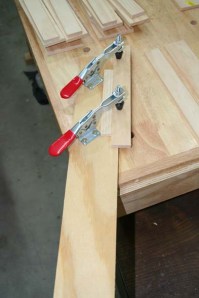
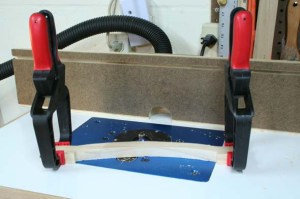
The strips used for the tote sides are ripped from 4″ thin stock. I set my table saw to make the larger strip 2″ wide and the thinner strip was whatever was left which ended up being about 1 1/4″ (if think). I beveled the face edges on the router table and came up with this device which I named “The Finger Saver”.
As you can see, I didn’t over-engineer it. Simply a couple of Harbor Freight horizontal clamps on a piece of scrap. I didn’t even cut the scrap I mean why, the length just gave me more of a handle so I used as-is. For the thinner pieces of the two, I inserted a spacer strip to steady everything.
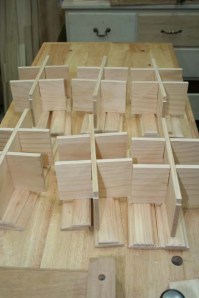
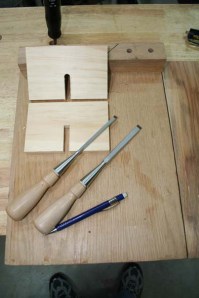
I made the slots for the dividers using two different methods. At first I though it would be easy to route the slots on the router table. I mean once I got the fence set I should be able to run all the tabs through, then raise the bit, run them, raise the bit, repeat until I am all the way through. Sounds reasonable but in practice many things made this a poor method. First I always have trouble setting my router fence square to the table. Second I always seem to be off just a bit, never being able to find an exact center of the board. Third it is a stopped dado and thus the router must be turned off and allowed to spin down completely before removing the work piece. Failure to do this will mar you work, in some way it will get messed up trust me no matter how careful you are removing the piece from a spinning bit is a bad idea. So I had twelve of these to do before resetting and then doing another twelve cuts on the long dividers. Oh, and remember you still have to hand chisel the end of the slot if you want it to be square as the router bit leaves it round. Madness I say!
After doing a bunch of these I decided enough was enough so I took the long pieces over to band saw and using my miter gauge, rip fence and a steady hand knocked out the rest of these in no time at all. These turned out clean, square and with a far better fit. Lesson learned.
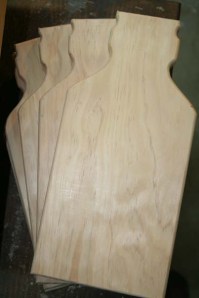
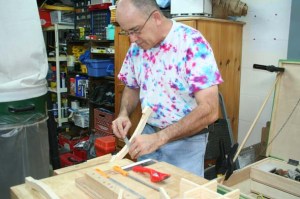
Next came shaping the curved handles. I never did get the prototype handles just right so I know I had a challenge ahead making six keepers for the production totes. On the protos I cut them out then took them to the belt sander but that didn’t really work. Without a perfect template, it’s hard to cut out a “perfect” handle so I got as close as I could cutting them on the band saw and decided to try shaping them with rasps. Crappy as I’m sure they are my HF rasp set allowed me to fairly efficiently shave the band saw marks off and finish the shape. I’m definitely sold on rasps and would like to actually buy a few in the coming years, especially if and when I ever start building guitar necks.
The oscillating spindle sander was efficient at cleaning up the rasp scratches and the handles were dressed at the router table with 1/2″ round over bit on all 4 sides.
What’s This?
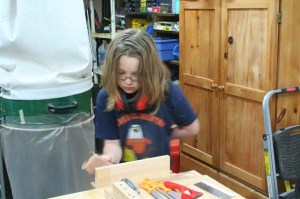
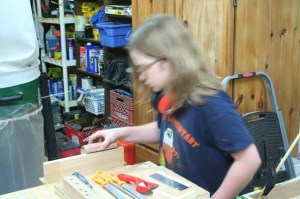
Santa’s workshop is a very busy place this time of year. Here is a rare shot of one of Santa’s Helper Elves working on a project for her Mom. Not wanting to waste time, Santa’s Elf works very quickly wanting to constantly move to the next step. Unlike Santa, his elf hasn’t yet learned the gift of patience. The project is a sign that says “Susan” on it.
To be continued on the following weekend…… stay tuned….
You have been building Christmas toys with the Turtlecovebrewer and Santa’s Elf Alexandra
