Building Jeff Miller’s – “A Benchtop Bench” – Part 3
I was able to complete the mini-bench build over the 3-day July 4, weekend. Hurray! So let’s get on with it shall we?
Friday Build
Friday was the July 4 Holiday for us as the actual day fell on Saturday. I was able to get some build time in on the mini-bench. I began by attaching the top to the trestle base as a first step in figuring out the vise assembly. When I began this project I found myself referring to the plans quite often but as the build progressed, I was at the point of needing to figure things out a bit on my own.
My last quick post was that I had decided to downsize the thickness of the vise chucks but it became immediately obvious that the bench-side chuck had to be the thicker (3 layers of 3/4″ vs only 2) version. This because the veneer press nut was to be recessed inside the face and 2 layers just didn’t cut it. So I ended up with 3 layers on the inside and the 2 layer version for the outside. The colors don’t match, oh well…. it’s not fine furniture.
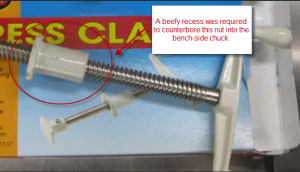
Had to go with the larger sized inside chuck in order to hide this large veneer screw nut inside it.
I decided to add a thin sheet of plywood on top of the bench for two reasons; first the plywood would make the top perfectly flat and second I could replace it when it get’s chewed up in the future. I needed to go ahead and mount the ply because this would impact where I needed to mount the vise. So I did this before the next step.
Before I could route for the nut, I first need to mount the inside chuck. To this end I decided how many 3″ screws I wanted to use and laid out their position then using my drill press and a 3/8″ Forstner bit, I counter bored then followed up with a smaller twist bit drill completely through. After clamping the chuck into position (it’s pretty heavy) I used an even smaller bit to pre-drill into the bench side to accept the screws. Not wanted to over-tighten I set the clutch on my drill and drove the screws home.
I could now decide where the two vise screws would be best mounted and I marked these positions before removing the chuck. It was time to make the recess for the vise nuts and it was at this point that things went a bit wonky. I started by routing shallow area, slightly deeper than the flange. I then needed to figure out how to drill for the nut casing using a limited number of sizes from my drill sets. Here’s what I knew: a 5/8″ hole was not quite wide enough to allow the screw to penetrate. A 5/8″ hole followed up with sand paper and patience could be made to work. A 3/4″ hole allowed the screw to pass freely and I decided this was the way to go. The screw nut was too big for my 1″ bit and the only thing I had even close to size was a hole saw. Let’s just say, I tried it and I wasn’t happy with the result 😦 I finally gave up trying to be close and used my largest Forstner bit 1-38″. The hole was over-sized but the screw was kept in place with two screws through the flange so I called it, “good enough”. If I had been worried I suppose I could have backfilled the area around the outside of the nut but the shallow recess holding the flange, the two screws and the fact that this is inside the chuck screwed to the bench gave me a feel some confidence it will work as is. Should the nut come loose in the future, I can always unscrew the chuck and service it.
So with the flanges mounted, I re-mounted the chuck so that I could mark where I needed to drill into the bench. The vise screws needed a place to go as the vise is closing. The good news, pine is soft. The bad news, these holes needed to be deeper than any bit I had at my disposal. I began the hole with my 3/4″ Forstner bit and when it bottomed out, I switched to a 3/4″ twist bit. When it bottomed out I figured I was done. It was a sloppy job and the holes where not quite deep enough for the chucks to close fully. It wouldn’t be until Sunday that an answer would come to me. But that was it then, the bench was finished (almost).
Saturday Build
As I had made substantial progress on the bench build on Friday, I decided that I would go to town with my wife and daughter on Saturday. Susan works out everyday and this gave me a window in the morning to drill the dog holes in the chuck and bench top. Once again, I began the drilling with my 3/4″ Forstner bit and then it occurred to me. I have Spade bits, they are long and I can finish drilling through the top with a Spade bit! Why hadn’t I thought of them before while I was anguishing over not having any long auger bits? Because woodworkers don’t use Spade bits, right …. Foolish thinking I say! Of course I did clamp a board onto the underside of the bench to help with blow-out but let’s face it, this is 2×4 pine so there was some splintering even with this precaution.
I used my trim router and a chamfer bit to make a nice chamfer on top. I don’t have a plunge base so with the power off, I carefully line up the bit and keeping one side firmly planted, I rocked up the other side, powered on and gently rocked the bit back over the hole. The technique worked perfectly once I had mastered it but it took a couple of tries to get the hang of it.
Intermission
Picture me now surfing the net, drinking Starbucks while my wife and daughter shop for dresses at the Mall…..
Saturday Build (conclusion)
By the time we got home, the day was pretty much concluded. I wanted to get a coat of Tung Oil finish on the thing so that I could wrap up the project on Sunday.
Sunday Build
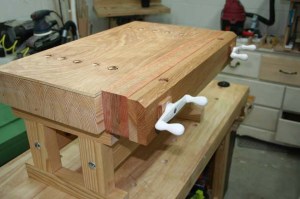
Entering the shop I encountered the lovely smell of oil finish still hanging in the air. My bench was exactly as I had built it the day before only a little darker in complexion.
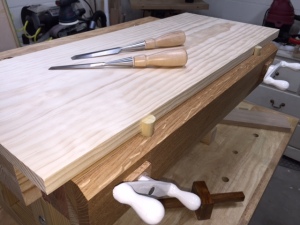
The last task for this project was to crank out a few shop made bench pups to try out the bench. Using the Lee Valley bench pup as my model, I made 6 pups on my band saw from 3/4″ dowel stock.
And finally a test to see if they work
Feels good to finish, thank-you for visiting the Turtlecovebrewer
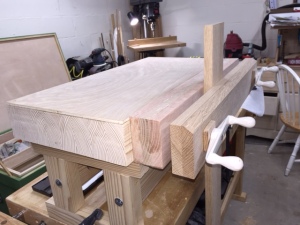
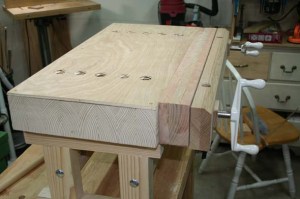

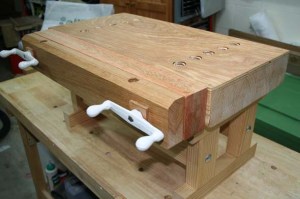


Looks good
Thank-you my friend. I suppose the main attraction with building this was to finally try out a Moxon style twin screw vise but I’m hoping it will be useful for other up close work.